 Back to Blog
Share an event timeline without making viewers create accounts
Organizing an event means coordinating several moving parts: a venue, catering, invitations, approvals and the day itself. A shared timeline gives people a common view of the plan without another long email explaining every date.
With Planoramic, a public timeline can be viewed without an account. That is different from invited collaboration: people invited by email to collaborate need a Planoramic account.
Open the office year-end party example.
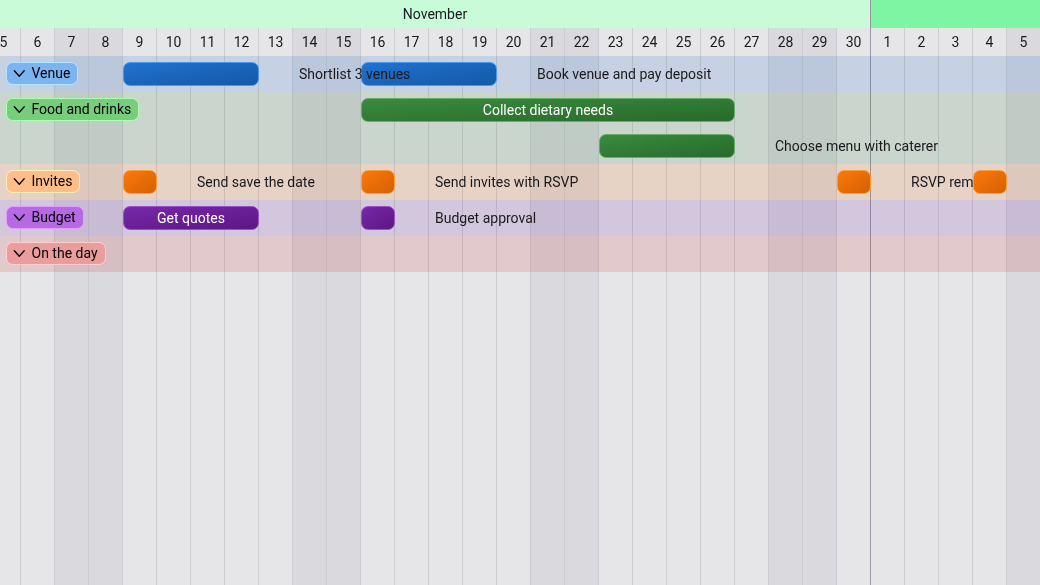
1. Organize the event into practical swimlanes
For an office party, start with five areas:
- Venue: shortlisting, booking, final numbers and setup.
- Food and drinks: dietary requirements, menu decisions and the catering order.
- Invites: save-the-date messages, invitations, reminders and the guest-list deadline.
- Budget: quotes, approval and payments.
- On the day: the event itself.
This structure makes it easier to see work happening in parallel. Venue research and collecting quotes can happen at the same time, while the final catering order needs reliable attendance numbers.
Adjust the dates and task names for your own event rather than treating an example schedule as a universal planning timetable.
2. Work backwards from the event date
Place the event date first, then identify the decisions that must happen before it. For example, close the guest list before confirming final venue numbers, and confirm those numbers before placing the final catering order.
Choose realistic windows for the work. “Collect dietary needs” may run for several days, while “Budget approval” is a more focused checkpoint. Keep the plan readable by naming tasks after the actual decision or action.
Planoramic supports drag-and-drop timeline editing, so you can adjust the schedule as your arrangements develop. Review related tasks whenever a date changes. Do not rely on automatic rescheduling or automatic messages announcing every change.
3. Decide what belongs in the shared version
Before making a timeline public, remove anything unsuitable for public access. Do not include guest contact details, dietary information tied to named individuals, payment credentials or confidential supplier arrangements.
A task called “Collect dietary needs” is enough to show the planning step. The private responses can remain in the appropriate separate system. The timeline is a schedule, not a place to publish personal records.
Public does not mean restricted to a named guest list. Only use public sharing for information you are comfortable making accessible beyond the organizing team.
4. Separate viewers from collaborators
Make the timeline public when people need to open a link and read the schedule without creating an account. Check the link in a signed-out browser before distributing it.
Invite collaborators by email when they need to work with you on the timeline. Those collaborators need accounts. Do not describe account-free viewing as account-free editing.
Real-time collaboration helps organizers work from the same plan. Task email notifications are also available, but do not assume that people viewing a public link will receive reminders simply because they opened it.
5. Keep one schedule current
Review the timeline when bookings, attendance deadlines or delivery arrangements change. Tell people which schedule to consult, and keep sensitive operational details separate from the public version.
Explore the office party example for a starting structure, then build a plan that fits your event and the people who need to see it.


